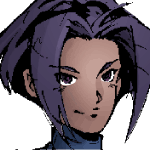
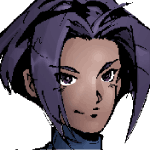
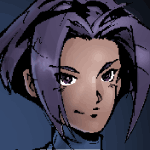
Here's how to put it all together!

GLOSSARY of TERMS:

Selection: An area marked of for painting by using one of the following tools: the Lasso, the Wand, the Marquee, the Pen, QuickMask, Alpha Channels. Only the area inside the selection will be effected.

Marching Ants: A slang term created by photoshop users to describe the animation effect Photoshop uses to show the selected area...because it looks like little marching ants.

Cuts: Creating selections on top of a filled object to alter the underlying color in the specified area.

Bezier Curves: Term for the control modules of a vector line. The modules consists of Node points and Handles. The node point designates the point on a curve where the line changes direction. The Handles control in which direction and how severe the change in vector will be. Variations of a line are controlled by "Dragging" the handles toward the node point for a drastic curve or away from the point for a subtler arc.

To Command or Control:
I use windows so I say "Ctrl" and "Alt" when referring to keyboard shortcuts but the same shortcuts can be used for Macs.

Ctrl = Cmd
Alt = Option

Usefull Keyboard Shortcuts :

Ctrl+H = shows/hides marching ants.
Ctrl+D = Deselect current selection
J = selects Airbrush
G = selects Gradient Tool
Shift+G = cycles thru gradient types
L = selects Lasso
Shift+L = cycles thru Lasso types
P = Pen Tool
A = Direct node select tool
B = Brush(paint brush)
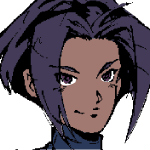
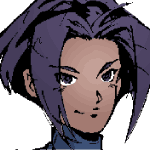
 

1) Start with a flat fill color Just like the last 2 times using the darkest shade the object will be. only fill with flat colors at this point. No Shading! Save a copy of the flats on it's own layer so you can go back to it and make area selections. If you've ever tried to select a color that a gradients been applied to you'll notice it only selectes the area in bands of color..save the flats!!!
2) Grab your Radial Gradient tool. In the properties palette for the tool set the blending mode to screen and the opacity to 12% or so. Also, set the gradient to go from "Foreground to Transparent". Make sure you have your object selected or you'll paint over the entire picture. Drag the Gradient tool from the intedended light source towards the shadow.

Groovy!!!
3)Grab a hard-edged paintbrush and set the mode to Multiply and opacity to 19% . Use the eyedropper to grab the color you are about to apply shadow to and paint around the shadow areas to get that anime "Cel Painted" look. Grab your airbrush again and switch the mode to "Multiply' and the pressure to 6%. Choose a cold color like desaturated blue or purlple and lightly spray the shadowed area of the flesh tone. You'll notice the skin becomes rich and full. Don't overdo it or it will look bruised.
4) now it's time to add highlites. Make cuts with the different selection tools. Use the eyedropper to grab the same color you are about to apply highlites to and set your airbrush tool to "Screen" and pressure to 12%. Airbrush lightly into your cut selections spraying back over areas you want to be lighter. Blend the highlites into the base color at the edge of the cuts. Ise the finger smudge tool is the highlite's edge is too stark.
Add Reflex highlites to the shadowed area. Cold colors work best for this but make sure it matches your established lighting setup. Notice how her hair and the edge of her chin pick up the reflected color of the blue light source behind her.

Practice makes perfect! Best of luck with your exercises!

--Patrick


©2000 Patrick Shettlesworth: Studio Atomica
Home