Another favorite
request is "How do I make comic tones in Photoshop"...the
reason I've stayed away from this one is that a) there's so many
variables it's nearly impossible to say "here's how you do
it" and have it work everytime. b) If you were really going
to print you would be working at resolutions of 600dpi or higher
which is quite the hit to your memory and processor.
This technique I'll show you is just for "mimic-manga"
purposes. Don't actually use this for production....buy some tones
from www.animegamersusa.com
|
 |
Step 1:
Fill an area
Create
a new greyscale document big enough to cover the area of the art
we will be transferring this halftone to. Fill it with 75% grey
|
 |
Step 2:
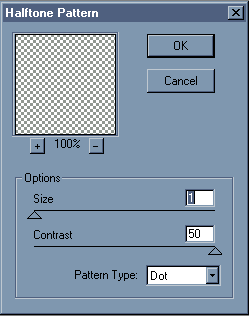
Run the halftone filter
Go to Filter>Sketch>Halftone pattern
Use these settings
|
 |
Step 3:
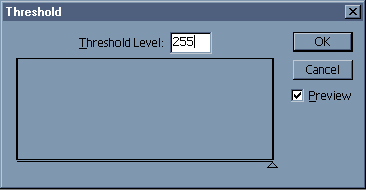
Threshold
If your dots
look a little grey. Choose
Mode> Adjust> Threshold
Slide the slide over till the image is black and white only
|
 |
Step 4:
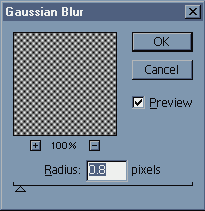
Blurry
Apply a gaussian blur. Play with the settings..I
used a .8 pixel blur...you may need less or more depending on
the size of your picture.
Why the blur? This will help us make the pattern look less like
a checkerboard.
|
 |
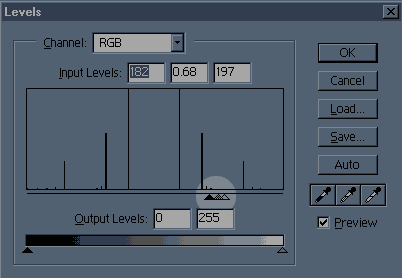
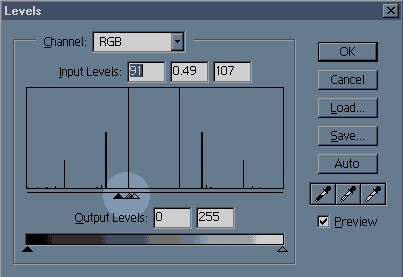
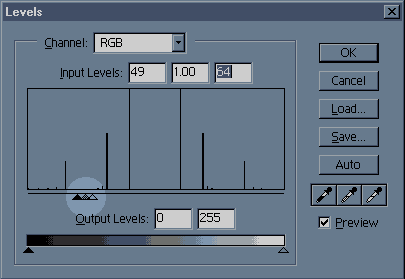
Dark Dots
Open the levels dialog box by hitting ctrl+L. Drag the 3 arrows
next to each other in the position shown. Here's the results:

|
 |
Medium
Dots
Open the levels dialog box by hitting ctrl+L. Drag the 3 arrows
next to each other in the position shown. Here's the results:

|
 |
Light Dots
Open the levels dialog box by hitting ctrl+L. Drag the 3 arrows
next to each other in the position shown. Here's the results:

|
|
|

