|
|
Step 6:
Now its time
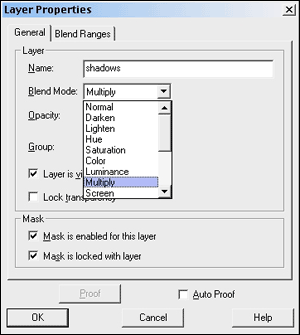
for the shadows and highlights. Make a new layer and set the Blend
Mode to "Multiply" and label it "shadows." Make sure to put the
Shadow layer above the Color layer and below the Lineart layer.
|
|
|
Step 6a:
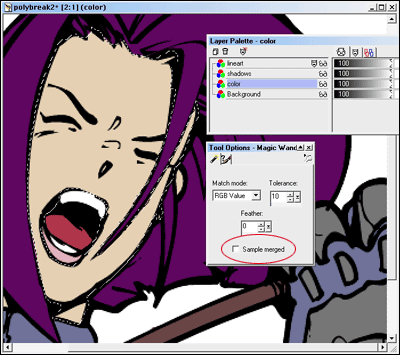
Now get the Magic Wand tool and select the Color layer, now with
the wand, select the part you want to shade (Make sure you have
the "Sample merged" box unchecked in the wands options). If the
part you want to color has been split up then you can hold down
SHIFT and click other areas to add to the selection.
|
|
|
Step 6b:
Return to the Shadow layer, select the FLAT COLOR you used on
the color layer and Airbrush in the shadows. You will see that
even though we chose the same color as the area we wanted shaded,
it gives a darker tone. Thats how Multiply works. Now that we
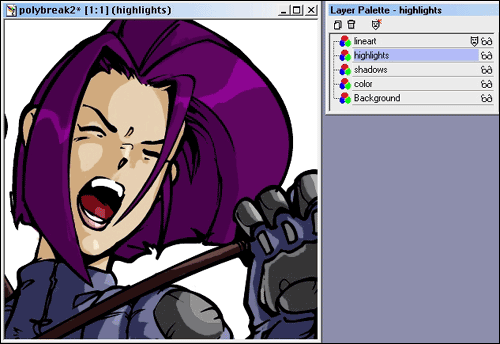
have shadows we may want to add highlights. Make another new layer
but instead of making the Blend Mode "Multiply" choose the mode
"Screen." Label the layer "highlights" and repeat the exact same
procedure as we covered in the shading. I have included the finished
product and all the layers used, just incase something went wrong.
|
Finito:
Thats it! We have just gone through coloring a drawing using Paint
Shop Pro. I have included the finished product and all the layers
used, just incase something went wrong.
|


